Introduction
Smedge can be easily deployed manually on Windows using either the MSI or the ZIP archive. You can even deploy Smedge to a file server and run it from the server on every machine if you wish. But if you want to deploy the software locally on your machines but have too many machines to manage manually, you can use a package deployment system to help.
There are lots of options, ranging from Microsoft’s SCCM to powerful, cross-platform solutions like Puppet and Chef. In this post, we will look at a simple, powerful, and inexpensive solution called PDQ Deploy, which is popular for Windows administration. Though the details are specific to how PDQ deploys things, the general principles will work with any sort of deployment system.
In this case, we are going to configure Smedge to run SmedgeEngine as a service on the machines. You can configure other types of ways of running Smedge, for example with logon/logoff scripts you configure by Group Policy, or running the SmedgeEngine component under the logged in user console with shortcuts in the Startup program folder.
Create a Package
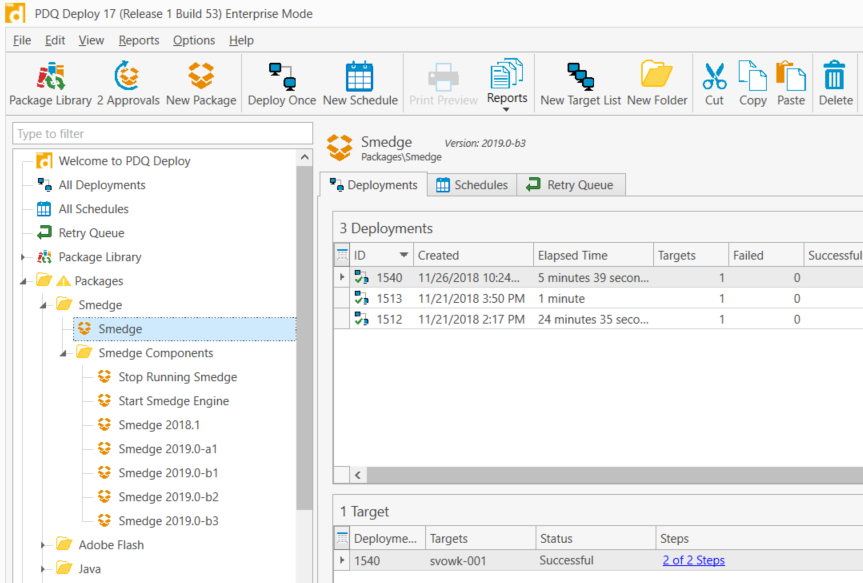
To start, let’s create a new package in PDQ Deploy, using the “New Package” toolbar button or the menu command File > New Package. On the details tab, give your package a name, like “Smedge”. Next we will create the steps needed for the package.
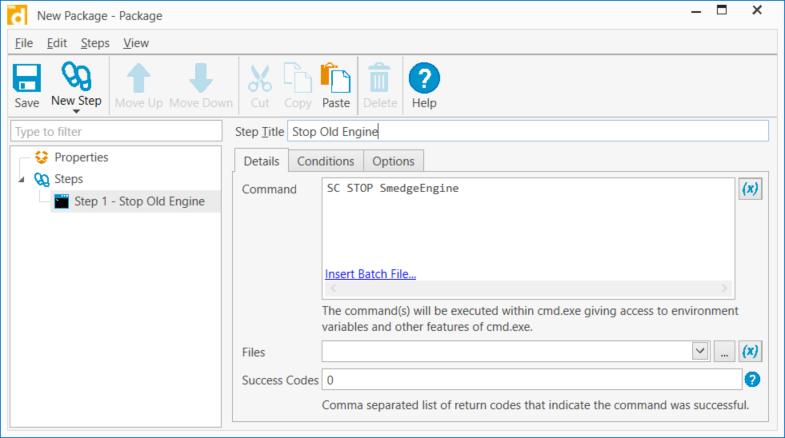
Step 1The first thing we want to do is try to stop any currently running SmedgeEngine service before the update (to avoid having to reboot the machine to complete the installation). Use the “New Step” button or command to create a new “Command” step. Title the step something like “Stop old Engine” and set the command to
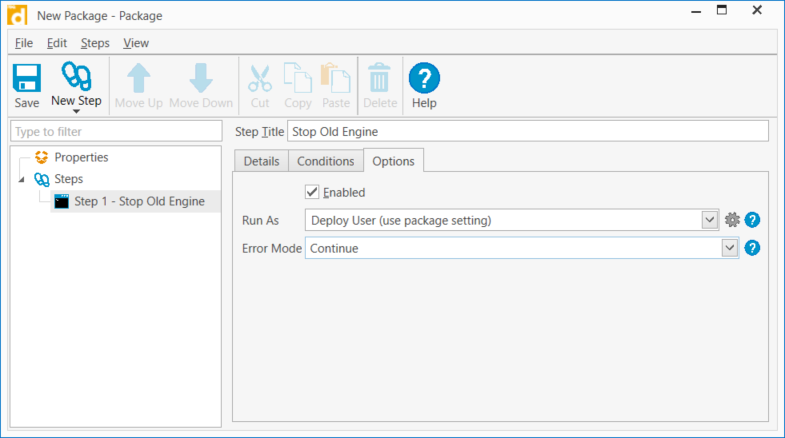
Of course, if this is the first time the package has been deployed to a machine, this step may fail because the service doesn’t exist or has been stopped. You can use the PDQ conditions to only run this step if, for example, the program files exist, and you can also use the Options to set the Error Mode for this step to “Continue,” so that a failure to stop because of one of these reasons does not stop the whole deployment.
Step 2Next, we will deploy the Smedge MSI to install the program files. The Smedge MSI installer will correctly uninstall an old version, if one is there, before re-installing, so you don’t have to do anything special to use it with PDQ. Use the “New Step” button or command to create a new “Install” step. For the file, select the Smedge MSI installation file.
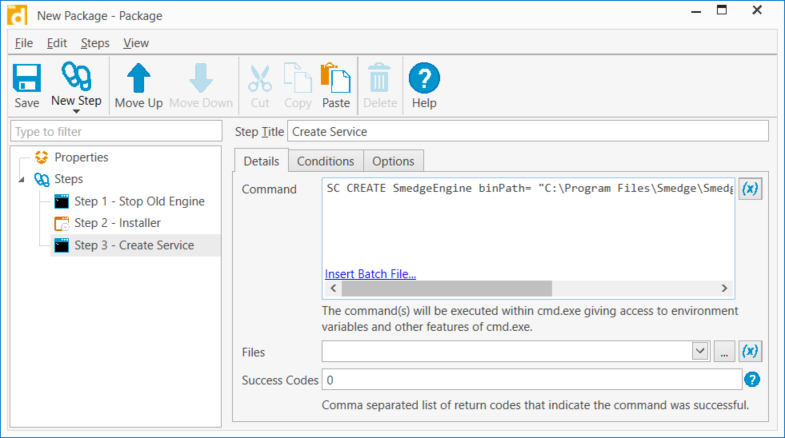
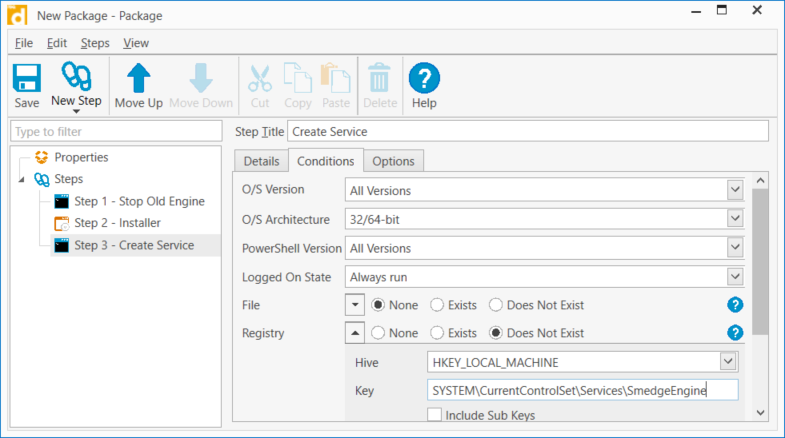
PDQ itself provides a lot of options for how software deployment actually happens. Commonly, you use the “copy” method, which copies the installation resources to the target machine before running them. In this case, you will want to ensure you put the MSI in a shared path that can be accessed over the network from the target machine, for example with a UNC path. For other methods of installation, take a look at the PDQ documentation and tutorials to see what other methods are available. Step 3Step 3 will configure the service. Use the “New Step” button or command to create a new “Command” step. The command is:
You may add additional Smedge command line flags or details about how you want the service to run by adding other flags to the SC command line. Look through the SC command line tool documentation for more details. Specifically, you will probably need to use a specific user account, in order to ensure that remote resources can be accessed, and may need to supply the password for the account as part of the SC command line. We will only need to run this if the service has not already been configured. If it has been configured before, updating the software (while the service is not running) is all you will need to worry about. We will create a condition to only run this step if the service registry key is not already available. Services are stored in the registry under the key
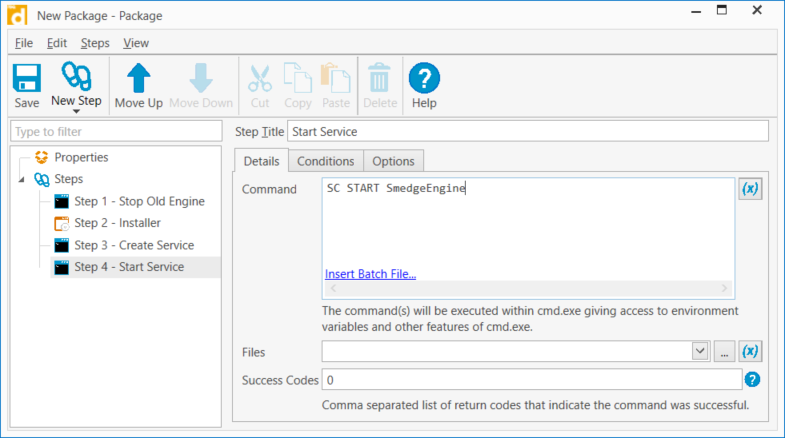
Step 4Finally, we are ready to start the service and make the machine available for rendering. Use the “New Step” button or command to create a new “Command” step. The command is:
|

Other Notes
Of course this is a very simple primer to this process and assumes you want to run Smedge as a service. But this is not the only way to work, and PDQ gives you a lot of options for how to pull off more complicated pipeline deployments, including simply copying files around directly instead of using the MSI or using PowerShell instead of batch file commands.
You will also need to ensure your PDQ configuration as a whole is set correctly. The PDQ documentation and tutorials are very good for learning about the tool or finding solutions to specific types of deployment issues. The biggest concerns tend to be ensuring that you have a user account capable of actually deploying to the nodes that PDQ can use, and ensuring that the source package content is accessible from the target machines.
Thanks, and see you in Smedge!