Sometimes you have a render process that generates a huge amount of disk traffic that may bog things down. Or perhaps you have nodes that have to write to slower cloud storage. Slow network, slow storage, or excessive I/O by the render process can put a serious damper on render performance. So what can you do?
Often, the solution is to use local storage on the render node, and then copy the resulting files you need to remote storage at the end. This allows the render process to run at full speed with fast local storage, which reduces overhead of I/O during rendering. Burst transfers often improve utilization of limited bandwidth resources. This is also useful if you need a post-process to archive, process, transfer, or otherwise prepare the files for their final storage as part of a pipeline.
Step 0: How Do You See Event Commands?
If you have never used event commands before, and have never messed with the default restrictions in Smedge, you probably won’t see the Event Commands tab when you submit jobs. To get access to event commands on a one-time basis, use the menu command System > Administrator Mode.
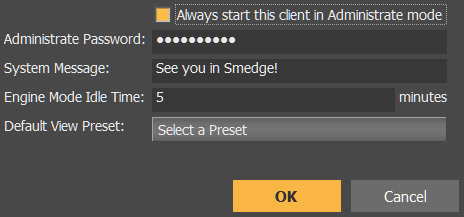
To permanently enable access to the event commands on a single machine without making it generally, accessible to all users, you can configure your specific instance of SmedgeGui to always run in Administrator Mode using the menu command System > System Commands > Administrator Options, and turn on the “Always start this client in administrate mode” option, then press OK:
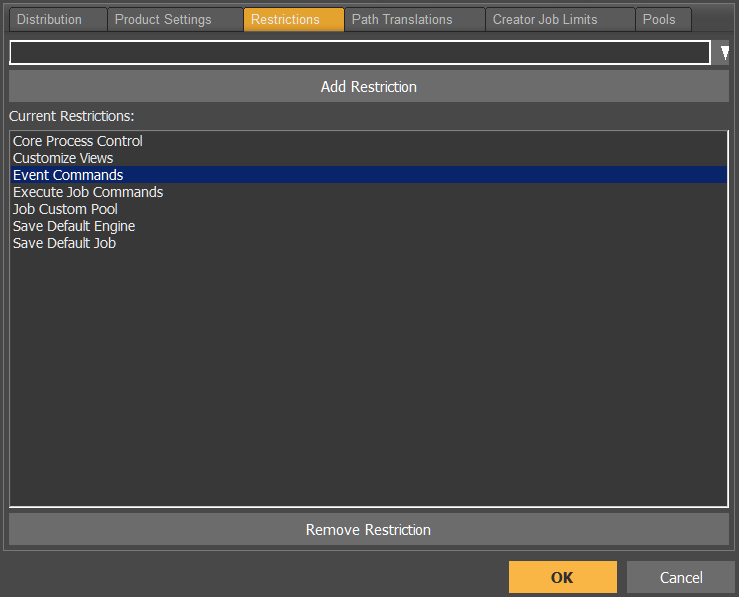
To make the event commands tab visible for all users all the time, you can remove the restriction using the menu command System > System Commands > Configure Master. On the Restrictions tab, select the “Event Commands” option and click the “Remove Restriction” button, then press OK:
Step 1: Override the output
Most Products in Smedge include the ability to set the output path for the frames that the render process generates. Some products, like Maya, have a separate parameter for it, and others, like After Effects, have the parameter optionally available in a common “extra” parameter that can include lots of other render overrides. Of course, if you are creating your own custom products, you can always add your own parameter for the final output folder, and pass it along to whatever tool you are using to configure your pipeline, but we can save that for another post.
So, getting the files to save to a local folder involves setting this output location to a useful local location. What should you set? Smedge gives you a few options that may make sense. The simplest is probably the “job local folder”, which is a folder that Smedge automatically creates in the system TEMP folder for the job. To be able to ensure that we copy everything even if we don’t know what files are going to be created ahead of time, let’s put it into a sub-folder based on the work ID, which is unique for every run of every work from every job.
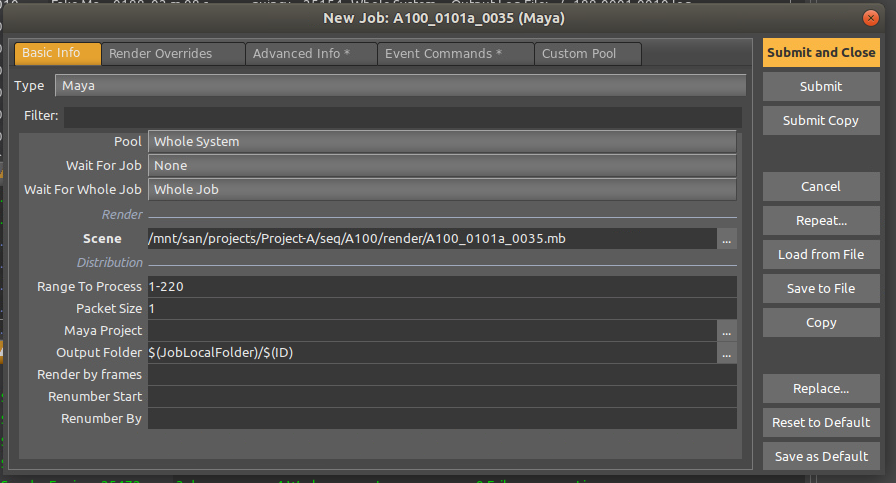
Here is an example of setting Maya to output to the local temp folder, using the OutputFolder parameter set to $(JobLocalFolder)/$(ID):
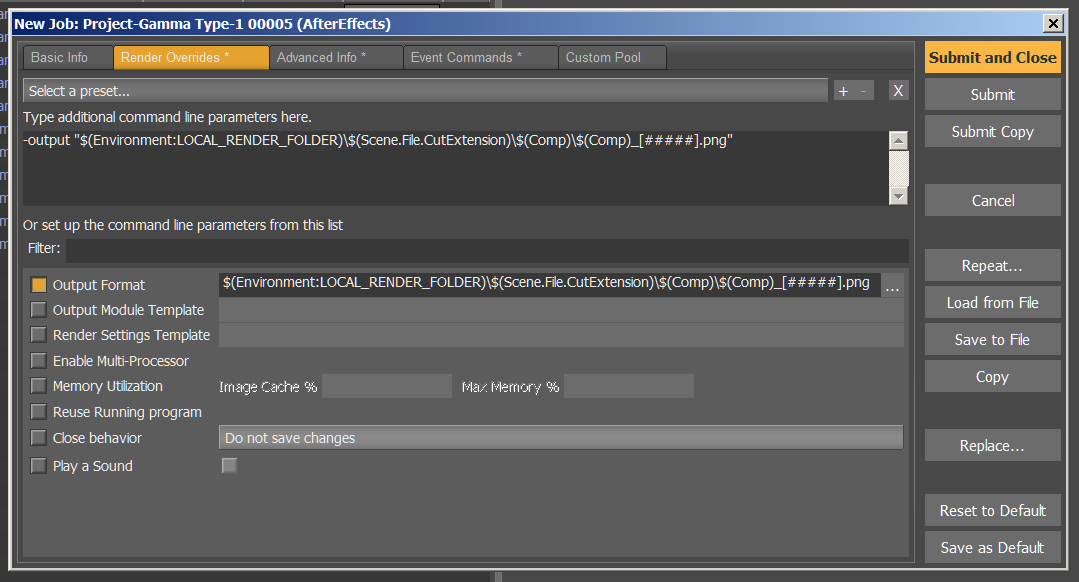
Another option is to use an environment variable. There are lots of ways to set environment variables, including as part of Smedge (but we can save that for another post). Here is an example of using a generic output format for an After Effects rendering pipeline that uses an environment variable and some of the job data to determine the ultimate output folder passed to AE using the output file pattern $(:LOCAL_RENDER_DIR)\$(Scene.File.CutExtension)\$(Comp)\$(Comp)_[#####].png:
Note that you can access an environment variable using the parameter name Environment followed by a colon then the environment variable name, but you can also leave off the word “Environment” and simply start with a colon character. These will produce equivalent results: $(Environment:VARIABLE) or $(:VARIABLE).
Additional Preparations
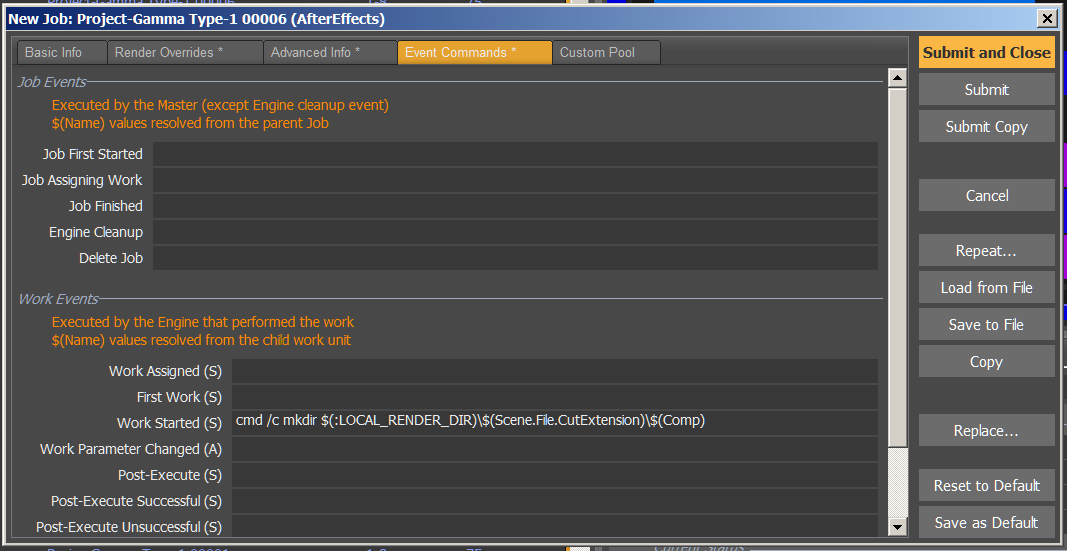
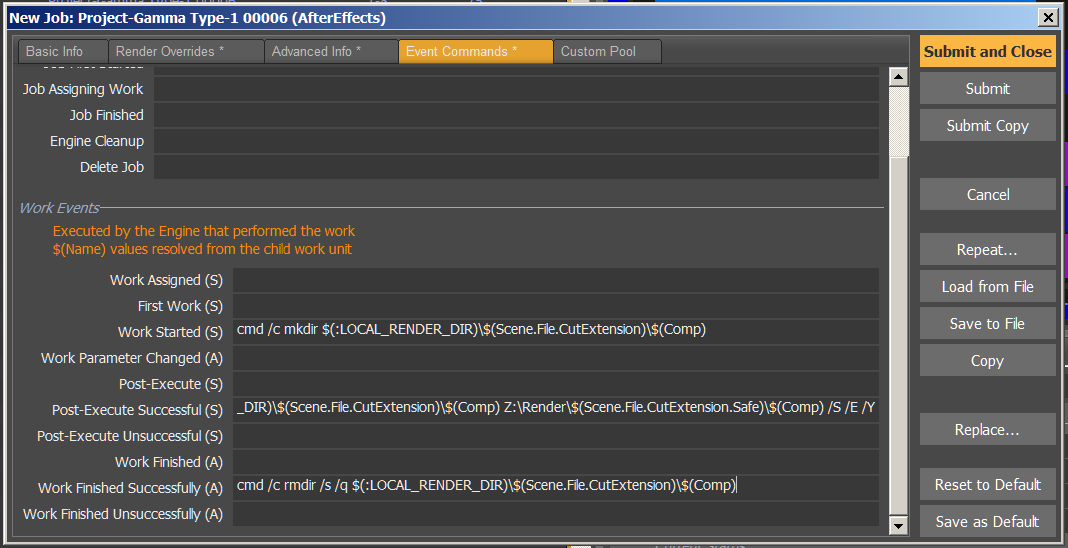
Maya will create any folders it needs as it renders, but After Effects will not. Because of that, we also have to ensure that the local folder where the output will be stored exists before AE tries to write files into it. We use the WorkStartedEvt to ensure that the folder exists using a simple shell command (in this case, Windows) cmd /c mkdir "$(:LOCAL_RENDER_DIR)\$(Scene.File.CutExtension)\$(Comp)":
Step 2: Copy at the End
At the end, we need to copy the files from the fast local storage to the slow remote storage. This can be as simple as a shell command to copy the files. On Windows: cmd /c xcopy "$(:LOCAL_RENDER_DIR)\$(Scene.File.CutExtension)\$(Comp)" "Z:\Render\$(Scene.File.CutExtension)\$(Comp)" /S /E /Y or on Linux: /bin/sh -c 'cp -r $(JobLocalFolder)/$(ID)/* /mnt/san/Render/$(Scene.File.CutExtension)/'.

Optional Cleanup
If your local storage is limited, you will have to keep an eye on the space utilized by work. The job local folder and all of its contents are deleted when the job finishes. However, you may want to ensure that you clean up a little more after work units while the job is still running if the output is large or there may be a lot of work on a node with limited local storage.
As usual, there are several options for how you could accomplish this. The simplest may be to change the “copy” operations to “move” operations. Because the call only happens when the job is successful, you will still have files there in the local folder if you examine what happened to failed work. Alternately, you can use the WorkFinishedSuccessfulEvt, which executes asynchronously with other work to run a cleanup command, like cmd /c rmdir /s /q "$(:LOCAL_RENDER_DIR)\$(Scene.File.CutExtension)\$(Comp)" or /bin/sh -c 'rm -rf $(JobLocalFolder/$(ID)'.
Step 3: Automating It
Once you submit a job with the values, the GUI will remember these for the next job, but that’s not a very reliable way to ensure you get the correct settings. However, if you’re here, you’re probably using the pipeline tools, like the submit scripts in the Utilities folder of the Smedge distribution for Maya or After Effects.
You can pass event commands through the Submit command line like any other job parameter, but be careful with quotes, which may need to be doubled or escaped, depending on the platform and your needs. You can also use the SJ Job file format, which is a simple text format file defining the job parameters. You can add these lines to add these event commands into your SJ file before submitting it:
WorkStartedEvt = cmd /c mkdir "$(:LOCAL_RENDER_DIR)\$(Scene.File.CutExtension)\$(Comp)"

WorkPostExecuteSuccessfulEvt = cmd /c xcopy "$(:LOCAL_RENDER_DIR)\$(Scene.File.CutExtension)\$(Comp)" "Z:\Render\$(Scene.File.CutExtension)\$(Comp)" /S /E /Y

WorkFinishedSuccessfulEvt = cmd /c rmdir /s /q "$(:LOCAL_RENDER_DIR)\$(Scene.File.CutExtension)\$(Comp)"
Don’t forget to also set the output path when you automate this. Exactly how to do that varies by the rendering product.
Additional Resources
You can see the syntax for using the command line submit tool in the User manual, and you can find more information about the $(Name) variable substitution system, about the SJ job files, and a detailed reference to all available parameters for every product in the Administrator Manual in the Smedge documentation. If you need help building a complex pipeline, feel free to contact us.
Thank you, and see you in Smedge!